The assessment criteria for the project is the following:
1.1 Use critical and contextual perspectives to initiate a personal self-directed art and design project proposal.
I will use my existing knowledge of the concept art development process and analytical skills to break down the project criteria. This will allow me to design a challenging project that will put all of my time to good use and create a product that demonstrates this.
1.2 Use analysis and evaluation to clarify and develop a personal self-directed art and design project proposal.
I must evaluate my own ideas against the theme of the project to determine what kind of project I should work on, and what I should include in the proposal. This will also be informed by my initial research. The proposal will outline what I intend to create, and what I plan to learn along the way.
2.1 Use research to support the development of a personal self-directed art and design project.
I need to research various sources that will contribute to the development of my project. I must also provide evidence of this research.
2.2 Use analytical and evaluative skills to develop creative solutions to realise a personal self-directed art and design project.
My project development must be informed by critical analysis. I must use my analytical and evaluative skills to identify the best way forward.
3.1 Solve practical and technical problems within a personal self-directed art and design project.
I must provide evidence of problem solving using screenshots and the WHEN rule (what, how, effective, now.) When faced with a problem that can’t be solved with conventional methods, I must think outside of the box to solve it.
3.2 Solve theoretical problems within a personal self-directed art and design project.
I must also come up with solutions for potential problems that could arise during the project. This will allow me to continue working when I encounter a problem, instead of hitting a roadblock.
4.1 Demonstrate the ability to plan, organise and produce a personal self-directed art and design project within an agreed time-frame.
I must create a schedule and complete all of the work on time. Planning and organisation also includes character bios and concept art. This shows that I have put thought into each character design.
5.1 Demonstrate the application of practical methods and skills in the realisation of a personal self-directed art and design project.
I must use the various skills at my disposal to complete the project.
6.1 Maintain evaluative and reflective records of the development of a personal self-directed art and design project.
I must upload blog posts for everything I do during the project. The blogs must include screenshots and use WHEN.
6.2 Use evaluative and reflective skills to make decisions for a personal self-directed art and design project.
Every decision I make during the project must be justified by critical thinking. I will share my work with my peers to gather feedback.
7.1 Explore strategies to present a personal self-directed art and design project.
I must lay out my presentation for the Game Festival. This involves exploring ways to present the project to an audience.
7.2 Present a personal self-directed art and design project to a specified audience.
I will present my project at the Norwich Game Festival.
For my final major project, I must create something based on an emotion. The product can be anything- concept art, a tabletop game, a 2D game or a 3D model. The emotion can also be something obscure- there are many complex emotions alongside the basics such as joy, sadness, anger and fear. These complex emotions include nostalgia, anemoia (nostalgia for an era one hasn’t experienced), liberosis (the desire to care less about things) and kenopsia (the atmosphere experienced when visiting an empty location that is usually busy.)
When brainstorming my project, I gravitated towards the emotion of anemoia, because it allows me to explore various eras and aesthetics. I am particularly interested in the 50s, 80s and 90s. There is also the potential to incorporate wanderlust into a project based on anemoia. Wanderlust is the desire to explore the world, which can be associated with anemoia because one may envision a particular combination of time and place, such as 50s America.
My favourite Aesthetic styles include atompunk, cyberpunk, retrowave and vapourwave, all of which are related to the aforementioned decades. As for the product I would like to create, I have narrowed it down to two options- concept art and 3D modelling.
Initial ideas:
-A B-movie style poster to convey anemoia though graphic design. Content will reflect chosen era. This will be supported by plenty of concept art.
-3D models, with potential for 3D printed props. I may 3D print a prop to support the poster project.


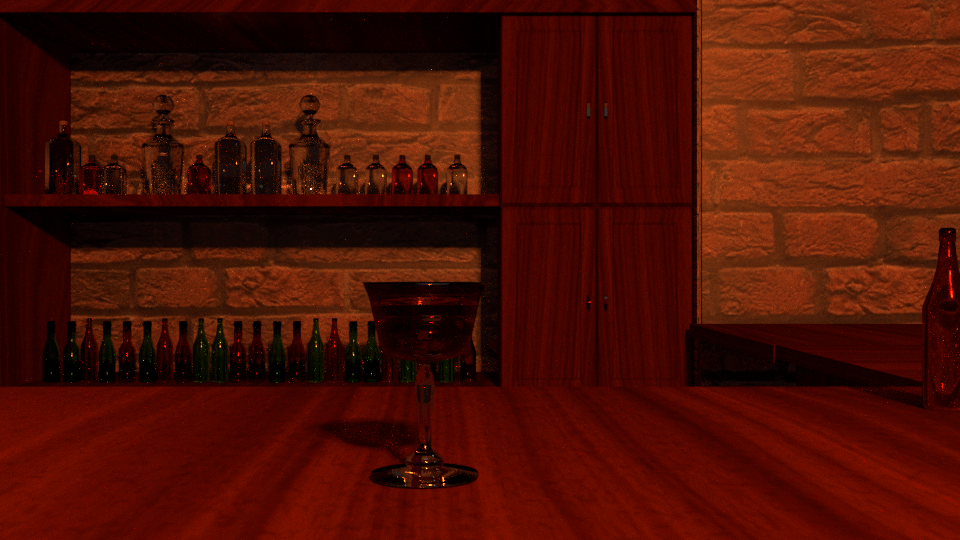
The bar is almost complete. However, there are only two remaining obstacles before the end of the project. These are the wall textures and the lighting. I was unable to fix the problem with the brick textures, and with time running out, I had to come up with a creative solution. To remedy the problem, I rotated the texture 90 degrees on the Y axis, using a mapping node. I applied the texture to a cube, and copied the cube multiple times, placing it just in front of the existing walls. This way, the bricks are the same size on each wall, even though the texture itself isn’t working properly. I would have preferred to have fixed the texture, but time is running out and I just couldn’t figure out the solution.


For the lighting, I would have to use my initiative, because black and white photos don’t show the colour and strength of speakeasy lighting. I decided to use the same light emitting material I already had, but increased the strength to 15,000. This makes the bar easier to see, whilst retaining the mood I originally intended to create. I also wanted to create a simple light object, so that the lighting has a physical source.


With the ceiling light in place, the bar is finished. Overall, I am proud of the end result.
The next step to creating my speakeasy is the most important part; the bar. While creating the bar itself may be simple, it presents a new problem. I must be able to scale the props correctly. If the props aren’t to scale, then everything will look out of place. To do this, I must import all of my existing objects into the same file first, before creating the bar. This was easy to do, I simply had to use the append feature to import the objects from the other files. I then scaled all of the bottles and glasses I have so far to a similar size, scaled the stool to realistic proportions and made a cuboid as a bar placeholder.


When modelling the bar, I looked at my previous reference images- photos and other 3D models- and decided to make simple wooden panelling. This was easy to create using extrude and scale tools, and works to effectively communicate an art-deco aesthetic without being too complex. Its simple design also allows me to resize it with ease.
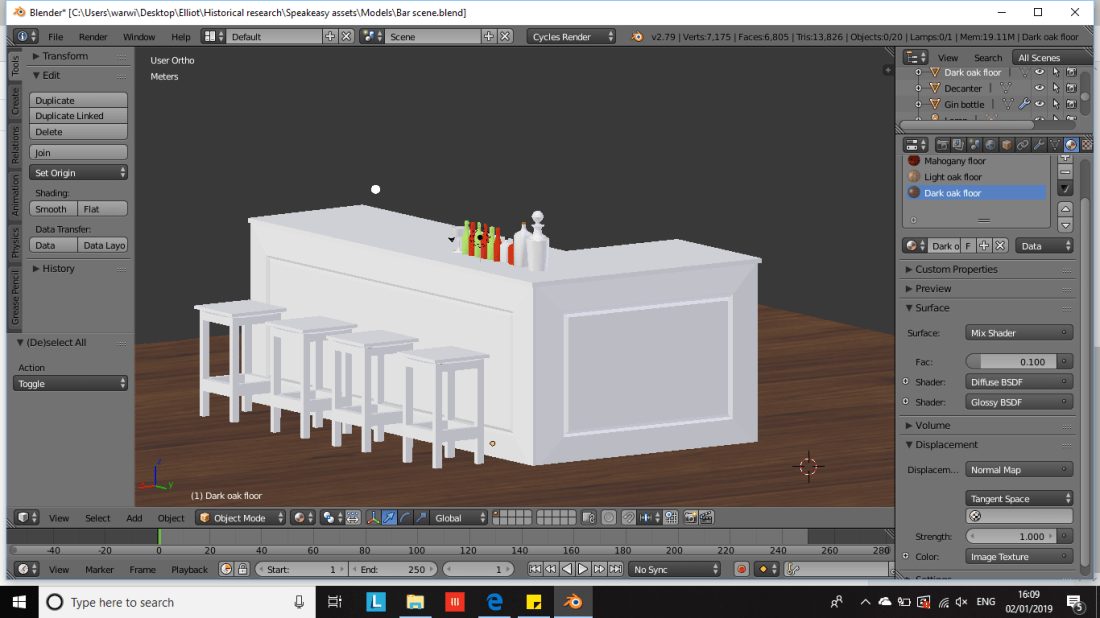
Using the bar for scale, I blocked out the rest of the area using cubes. This allowed me to get a sense of the scale of the bar, without modelling anything else first.
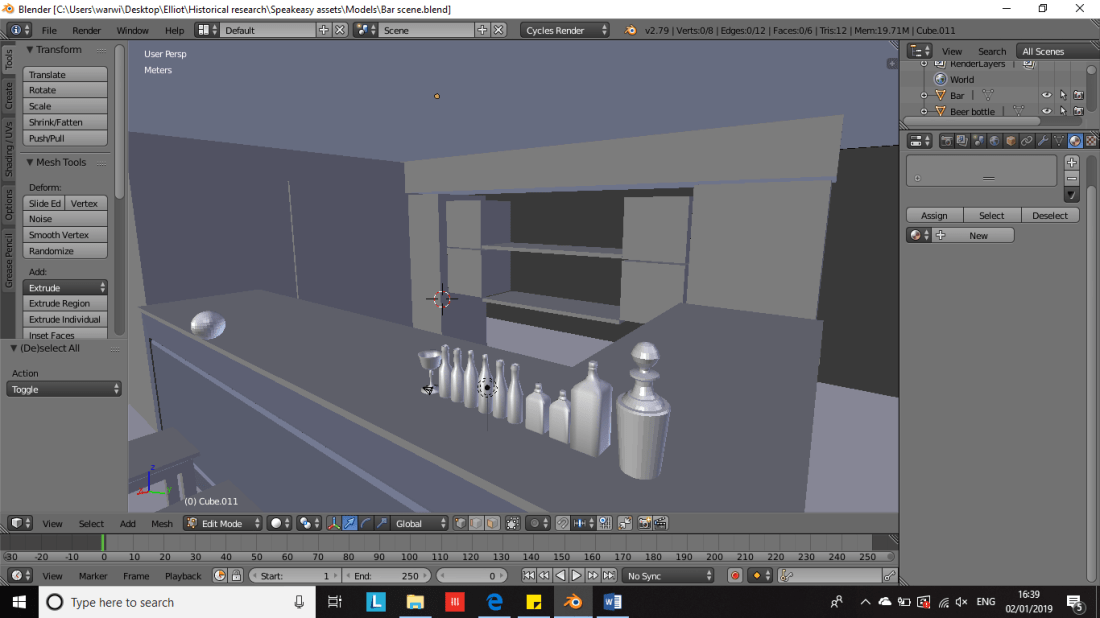


Most of the remaining structures are simply textured cuboids, with the exception of the cabinets and wooden back panel. I decided not to make the top cabinets and shelf from my original concept, because these would be too high compared to the rest of the bar area. I also decided not to make glass windows for my cabinets, because this would take too long to make, and I would rather finish the bar first.
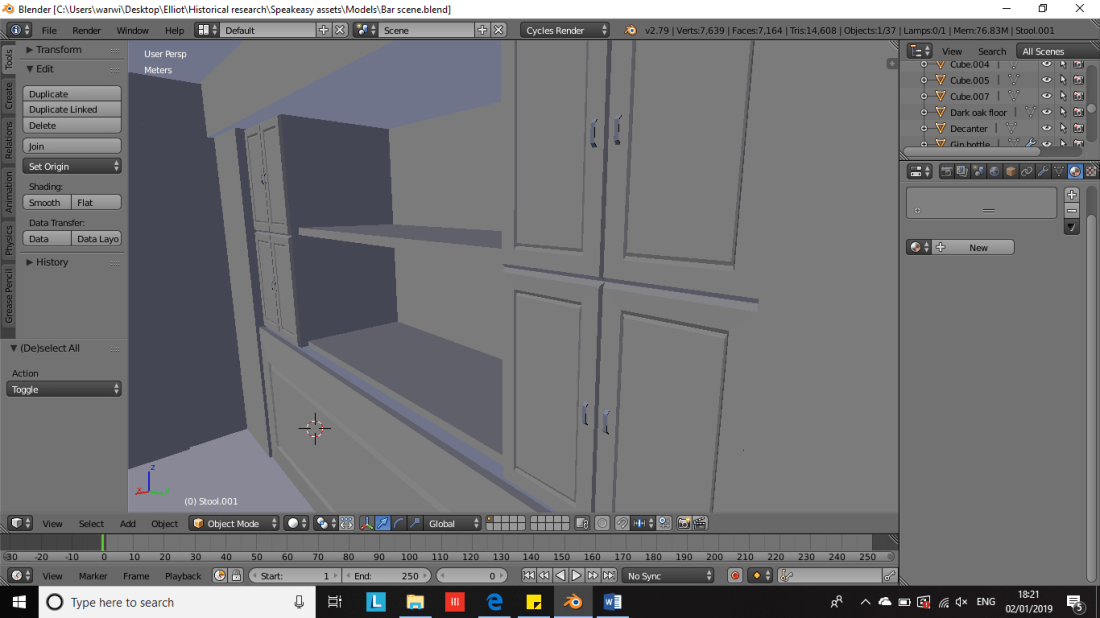
I added textures to the bar, stools, cabinets, shelves and ceiling. I also changed the placeholder lighting from blue to orange and increased its strength to 3000. This gives the bar a soft glow, which accurately reflects the lighting I imagined the speakeasy would have.

For the walls, I decided to use a brick texture. As of right now, I don’t know how to resize and rotate textures, so I will research solutions to this problem. So far, I have tried a method that involves mapping, but this only scales the texture correctly on one side of an object, and stretches it out on the others. I will come back to this later.
In spite of this problem, I made a textured door with a basic doorknob, which would lead to the kitchen. I also laid out all of the glasses and bottles.


With these steps out of the way, only two objectives remain; Fix the textures to scale correctly, and refine the lighting.
With the knowledge that oak wood was used for flooring in 1920s America, I have created two experimental oak textures for my speakeasy. I created these using the same method I used to create the mahogany textures, which has proven to be effective.


Of these textures, I prefer dark oak, because I think it would best fit the tone of my speakeasy.
Using the references, I created multiple bottle models. These include 3 beer bottles, a whiskey bottle and a gin bottle. The beer and whiskey bottles also have alternative models that use different colour glass, to add to the variety of bottles on display. The process of creating the beer bottles was simple, because I just had to use a cylinder as the base shape and sculpt it by extruding, adding loop cuts and dragging vertices. The gin and whiskey bottles were more complex, because they have a cube base which is moulded into a cylindrical shape at the top. I created this shape by adding loop cuts and dragging them out at the top to form the cylinder, using the mirror modifier to keep it symmetrical. The glass was created by simply selecting the glass BSDF material and changing the colour.
Overall, I am pleased with the end result.


When researching the types of bottles found in speakeasies, I started with three distinct types of alcohol, so I could create a diverse array of bottles. These were whiskey, beer and gin.
Whiskey bottles are short and wide, with a rounded rectangular base, similar to a flask. They are usually made of brown or colourless glass, are sometimes etched and have printed labels.


Gin bottles are similar to whiskey bottles, but taller, with a more square base.


Beer bottles are cylindrical, with a bottleneck that curves inwards. They are usually made of green or brown glass, and have either a printed label or embossed text.


With these designs I mind, I will develop a set of bottles to display in the speakeasy.
The first step to creating my speakeasy is to create wood textures. Wood textures will be essential for creating models such as the floorboards, stools, shelves, cabinets, and the bar surface. I have decided to use mahogany, because this wood type works well in an art deco aesthetic.
To create the materials, I used Materialise to create texture maps, and implemented them using nodes similar to the ones in the previous detailed materials tutorial. I created two textures; One for the floorboards, and one for everything else that uses mahogany. At first, the textures looked dark, and I thought I had made a mistake when making them. However, this was due to lack of lighting, so I added a light and increased the brightness, which resolved the problem.
Overall, I found this technique effective, because the resulting materials are very detailed and aesthetically pleasing.


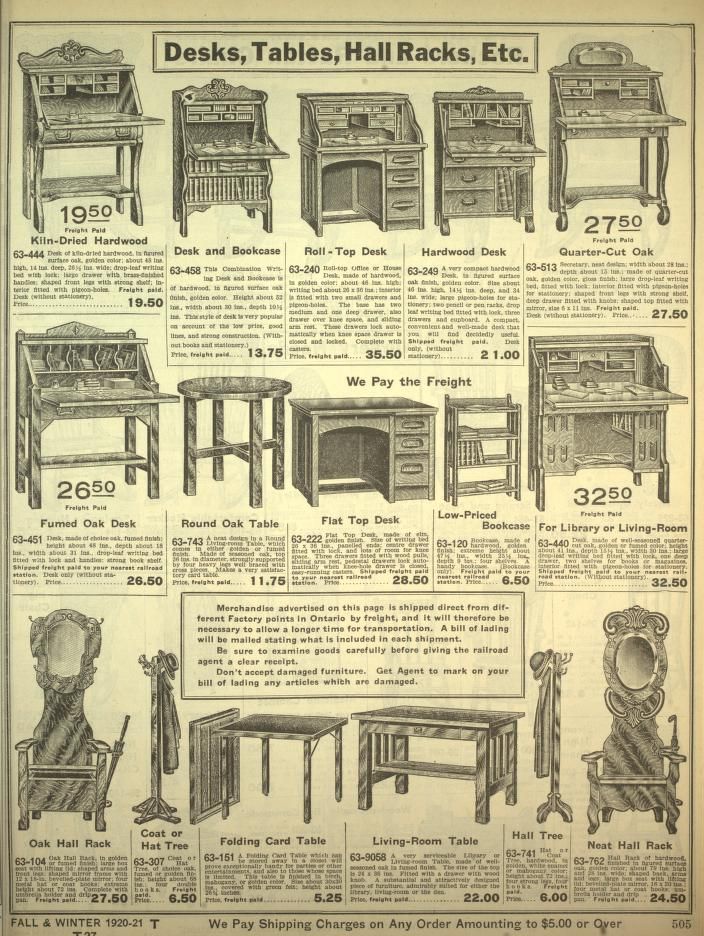
Upon further research, I have discovered that oak was a popular wood type used for flooring and furniture.
http://napervillehardwood.com/blog/wood-floors-in-the-1920s/
“There were a lot of changes and improved standards in residential home building. New materials and building methods meant houses were easier to heat and cool, were more hygienic, and far better suited to modern living.
Oak hardwood flooring really came into its own during this period.
New manufacturing processes meant better milled and more stable flooring was available (you can see an illustration of new milling techniques a few pictures below). Cool patterns like herringbone, chevron and basket weave were popular with wealthier homeowners… as well as parquet and strip flooring for ‘average’ homes.”

I have found some evidence to suggest that oak was a popular wood type used for furniture in 1920s America. For example, many pieces of furniture shown in this catalogue are oak. Because oak was a popular wood type in the 1920s, I will produce an oak texture for my models.